Raspberry Pi
Use
To use the Raspberry Pi, you must first make sure that you connect the appropriate power supply, 5V @ 1A. This should be achieved by connecting the Raspberry Pi to the Type-C connector wired to the buck down converter.
Note
Please make sure the input power to the Raspberry Pi is to specification. Both undervoltage and overvoltage will permanently damage the board.
Flashing the SD Card
Before starting, please download the Official Raspberry PI Imager.
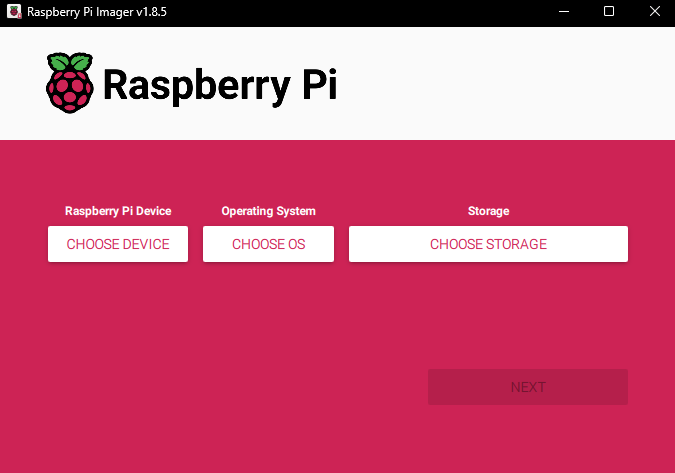
Once installed and launched, choose the model number of your Raspberry PI for the device, “Raspberry PI OS (64-bit)” for the operating system, and the inserted SD card for your storage device.
Note
By flashing your SD card, the contents saved on the device will be permanently erased. Be sure to back up any files and data to a seperate storage device.
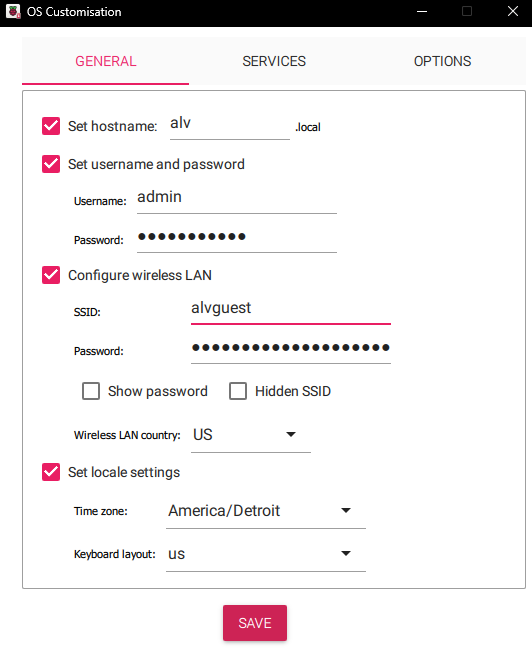
After hitting next, a popup will appear asking if you want to “apply OS customization settings”. When you press “EDIT SETTINGS”, another popup will appear with different configuration settings. Follow the image below to set your settings to the correct configuration.
Note
If you are an advanced user, or you understand how to enable SSH for the Raspberry PI, you may do so by clicking on the “Services” tab and checking off the box. Otherwise, leave that box unchecked.
After you have entered the correct OS configuration, save your settings. This will being you back to the previous window, where you can now click on “YES” to start flashing your SD card. Do not unplug your SD card or turn off your computer at this time; this may take a few minutes.